
What Equipment Is Used for Automotive Vibration Testing?
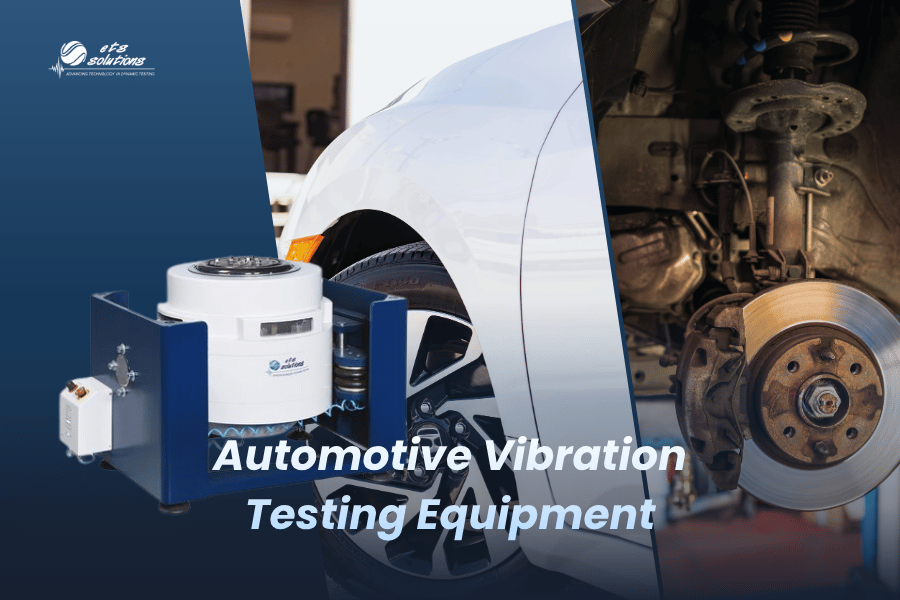
Automotive vibration testing typically uses a complete system made up of an electrodynamic shaker, power amplifier, vibration controller, slip table, fixtures or head expanders, sensors, and sometimes an environmental chamber.
The exact setup depends on the component being tested, the payload, test direction, frequency range, displacement, acceleration, mounting method, and the standard or customer test profile being followed.
For automotive engineers, the key point is simple: the shaker matters, but it is not the whole system.
A reliable automotive vibration test depends on how the shaker, amplifier, controller, table, fixture, sensors, and accessories work together.
Why automotive vibration testing matters
Automotive components are exposed to vibration throughout their life.
They may experience vibration from:
road surfaces
engine and powertrain operation
vehicle body movement
transportation and shipping
EV battery pack operation
off-road or heavy-duty use
thermal and mechanical stress combined
Testing helps engineers identify weak points before a component reaches the road.
A vibration test can reveal issues such as loose connectors, cracked solder joints, bracket failures, housing fatigue, cable movement, sensor drift, resonance problems, and durability weaknesses.
This is especially important for automotive electronics, EV batteries, sensors, connectors, powertrain parts, interior components, and vehicle-mounted assemblies.
1. Electrodynamic shaker
The electrodynamic shaker is the main vibration source.
It produces controlled vibration so engineers can simulate the vibration a component may experience during transport, installation, or real vehicle operation.
Automotive vibration testing often uses electrodynamic shakers because they provide accurate control over frequency, acceleration, displacement, and test duration.
What engineers check when choosing a shaker
Before selecting a shaker, engineers normally review:
test item mass
fixture mass
required force
frequency range
displacement
acceleration
velocity
armature size
test direction
duty cycle
future application needs
A small sensor or connector does not need the same shaker as a large EV battery module or vehicle assembly.
That is why shaker sizing should start with the actual test requirement, not only the force rating.

2. Power amplifier
The power amplifier drives the shaker.
It converts the controller command into the power needed to move the shaker according to the test profile.
In automotive testing, the amplifier matters because many tests are long, repetitive, and require stable output. If the amplifier is not matched properly to the shaker and test profile, the system may struggle to maintain control.
Why the amplifier matters
A good amplifier supports:
stable output
repeatable vibration control
long-duration operation
low distortion
system protection
compatibility with the shaker and controller
For automotive labs running repeated qualification or durability tests, amplifier reliability is not a small detail. It affects uptime, repeatability, and confidence in the test result.
3. Vibration controller and software
The vibration controller is the control center of the test system.
It tells the shaker what profile to run and uses sensor feedback to keep the test within the required limits.
Automotive vibration testing may involve sine, random, shock, or customer-defined vibration profiles. The controller helps ensure the test is repeatable and documented properly.
What the controller supports
A vibration controller is used for:
sine testing
random vibration testing
resonance search
durability profiles
closed-loop control
data monitoring
test reporting
safety limits and abort settings
For engineers, controller setup is one of the most important parts of the test. A good shaker cannot produce useful results if the control strategy, sensor placement, or feedback signal is wrong.
See also vibration testing fundamentals
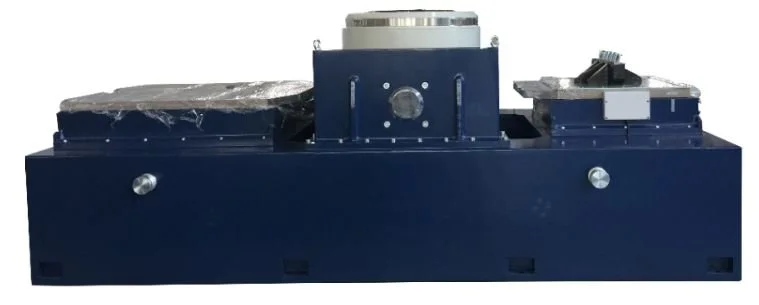
4. Slip table for horizontal vibration testing
A slip table enables controlled horizontal vibration testing.
This is important in automotive applications because many real vehicle loads do not act only in the vertical direction. Components may experience front-to-back, side-to-side, or multi-directional vibration depending on where they are mounted.
A slip table allows the test item to be mounted on a horizontal surface while the shaker applies controlled motion through the table.
When automotive labs use a slip table
Slip tables are commonly used when testing:
automotive electronics
battery modules
control units
sensors
connectors
brackets
interior components
mounted assemblies
larger or heavier components
Horizontal testing is often needed when the real mounting direction matters.
Why slip table alignment matters
The slip table is not just a platform.
It affects:
motion accuracy
cross-axis behavior
control stability
repeatability
fixture performance
bearing loads
test safety
Poor alignment can create unwanted loads, unstable data, or unnecessary stress on the system.
5. Fixtures and mounting hardware
The fixture connects the device under test to the shaker or slip table.
In automotive vibration testing, fixture design is critical because the fixture influences how vibration enters the component.
A poor fixture can create false resonances, over-test the component, under-test the component, or produce data that does not represent real vehicle conditions.
What a good fixture should do
A good automotive vibration test fixture should:
hold the component securely
match the real mounting condition where possible
maintain stiffness across the test range
avoid unwanted resonances inside the test band
allow accurate sensor placement
support repeatable mounting
handle the payload safely
For vehicle-mounted components, mounting direction and bracket design can strongly influence the test result. This is why fixture design should be reviewed early, not after the shaker has already been selected.
Common fixture problems
Common problems include:
flexible brackets
loose mounting bolts
resonance inside the test range
oversized or overweight fixture design
poor cable routing
inconsistent test item orientation
mounting that does not reflect the real vehicle condition
Before full-level testing, many labs run a low-level sine sweep or verification check to identify fixture issues.
6. Head expanders
A head expander increases the usable mounting surface for vertical testing.
It is useful when the test item is larger than the shaker armature or when multiple smaller components need to be tested at the same time.
For automotive labs, head expanders can help test:
multiple electronic modules
connectors
small assemblies
brackets
sensors
production samples
The head expander must be selected carefully because it adds mass and can introduce its own dynamic behavior. It should match the shaker capacity, test profile, and required frequency range.
When to use a head expander
Use a head expander when:
the DUT is too large for the armature
multiple samples need to be tested together
vertical testing needs a larger mounting surface
the fixture needs more stable support
Use a slip table when:
the test requires horizontal vibration
the real vehicle orientation is horizontal
larger assemblies need a stable horizontal surface
road or transport direction must be simulated
7. Accelerometers and sensors
Sensors measure what happens during the test.
Accelerometers are normally used to measure input vibration and the response of the test item. The controller uses feedback from the control sensor to keep the shaker within the target profile.
Monitoring sensors can also be placed on the DUT to see how vibration transfers through the component.
Why sensor placement matters
Sensor placement affects:
control accuracy
measured response
resonance detection
test repeatability
pass/fail confidence
If the sensor is mounted poorly or placed in the wrong location, the test data may not reflect the real condition of the component.
Common sensor issues
Automotive vibration labs often need to watch for:
loose accelerometer mounting
wrong axis direction
cable movement
sensor saturation
noisy signals
poor grounding
unstable feedback
Sensor and cable quality become even more important when the test is combined with temperature or humidity.
For troubleshooting related issues, see also Common Vibration Test Issues & How to Solve Them
8. Environmental chamber integration
Automotive components often face vibration and environmental stress at the same time.
For example, an electronic control unit may experience vibration while exposed to heat, cold, humidity, or thermal cycling. EV battery systems may need vibration testing under changing temperature conditions.
This is where combined environmental + vibration testing becomes useful.
What combined testing may include
A combined setup can include:
vibration + temperature
vibration + humidity
vibration + thermal cycling
vibration + altitude, depending on the program
This type of setup helps engineers understand how a product behaves when mechanical and environmental stresses happen together.
Why this matters for automotive applications
Automotive parts do not operate in perfect lab conditions.
They can be exposed to:
engine heat
cold start conditions
road vibration
moisture
thermal expansion
repeated load cycles
transport vibration
Testing these stresses together can reveal failures that separate tests may miss.
For combined testing guidance, see also Combined Environmental + Vibration Testing
For customization, see also Customized Vibration Testing Solutions

9. Options and accessories
A complete automotive vibration testing setup may require additional accessories depending on the application.
These can include:
thermal barriers
chamber interface components
remote control panels
air isolation
additional sensors
custom fixtures
safety interlocks
system monitoring accessories
cables and connectors
test-specific mounting hardware
Accessories are not just add-ons. In many test labs, they determine how easy the system is to operate, maintain, and adapt to future testing requirements.
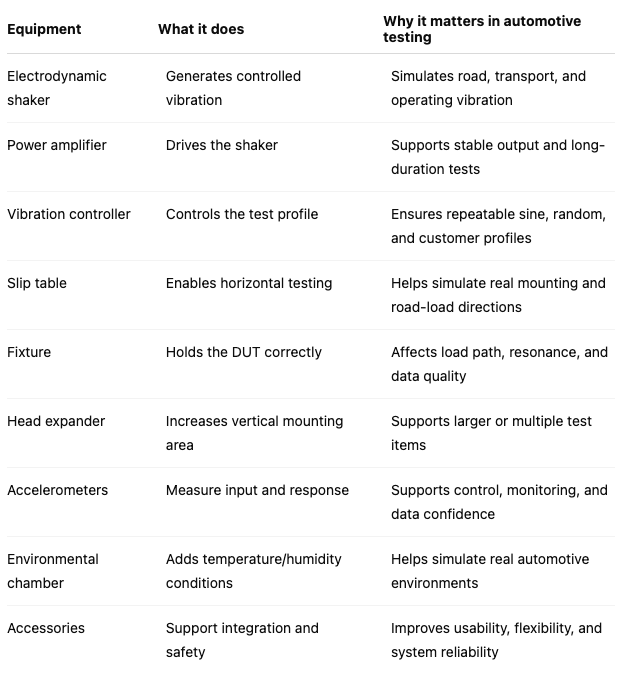
Automotive vibration testing equipment: quick comparison table
How to choose the right automotive vibration testing setup
The right setup starts with the test requirement.
Before choosing equipment, define:
What component is being tested?
What is the DUT mass?
What is the fixture mass?
Is the test vertical, horizontal, or multi-axis?
What frequency range is required?
What displacement, acceleration, and velocity are needed?
Which standard or customer profile applies?
Is temperature or humidity required during vibration?
How will the component be mounted in the vehicle?
Will the system need to support future test types?
A good supplier should help review the full system, not only the shaker force rating.
Common automotive vibration testing mistakes
Mistake 1: Choosing only by force rating
Force is important, but it is not enough. Payload, displacement, frequency range, fixture mass, and test direction also matter.
Mistake 2: Treating the fixture as an afterthought
The fixture can change the vibration load seen by the DUT. For automotive parts, mounting quality can strongly affect the test result.
Mistake 3: Ignoring horizontal testing requirements
Many automotive components need horizontal testing or testing in more than one direction. A vertical-only setup may not match the real application.
Mistake 4: Poor cable management
Moving cables can create noise, unstable signals, and unreliable data. Cable routing should be planned as part of the test setup.
Mistake 5: Forgetting environmental conditions
For electronics, batteries, and vehicle-mounted systems, vibration may need to be combined with temperature or humidity to better simulate real use.
What ETS provides for automotive vibration testing systems
ETS Solutions provides vibration testing equipment and system components for automotive, transportation, electronics, EV battery, aerospace, and industrial applications.
For automotive vibration testing, ETS can support system configurations that include:
electrodynamic shakers
power amplifiers
vibration control software and hardware
slip tables
head expanders
fixtures
options and accessories
chamber integration support
service support
ETS systems can be tailored based on payload, frequency range, displacement, test direction, fixture requirements, and application needs.
The goal is to help engineers configure a practical, reliable vibration test system that matches the real test requirement.
FAQ
-
Automotive vibration testing usually uses an electrodynamic shaker, power amplifier, vibration controller, slip table, fixture or head expander, accelerometers, and sometimes an environmental chamber.
-
A slip table is used for horizontal vibration testing. It helps simulate road, transport, or vehicle-mounted vibration directions that cannot be properly reproduced with vertical-only testing.
-
The fixture holds the device under test and transfers vibration into the component. A poor fixture can create false resonances, unstable data, and unrealistic test conditions.
-
Not always. But environmental chamber integration is useful when components must be tested under vibration plus heat, cold, humidity, or thermal cycling.
-
Start with the total moving mass, including the DUT and fixture. Then review force, acceleration, frequency range, displacement, test direction, mounting requirements, and standards.
-
Common examples include sensors, connectors, ECUs, battery modules, powertrain components, brackets, interior parts, electronic assemblies, and packaging systems.
-
ItYes, if the system is configured with enough flexibility. A complete setup with the right shaker, amplifier, controller, slip table, fixtures, and accessories can support different components and test profiles.
Final takeaway
Automotive vibration testing is a system decision.
The shaker is important, but it is only one part of the setup.
To get reliable and repeatable results, engineers need the right combination of shaker, amplifier, controller, slip table, fixture, sensors, and accessories. For some applications, environmental chamber integration is also needed.
If you are planning an automotive vibration testing setup, ETS can help review your payload, test direction, frequency range, displacement, standards, and application requirements to recommend the right system configuration.
Need help choosing equipment for automotive vibration testing? Contact ETS to discuss your test requirements.